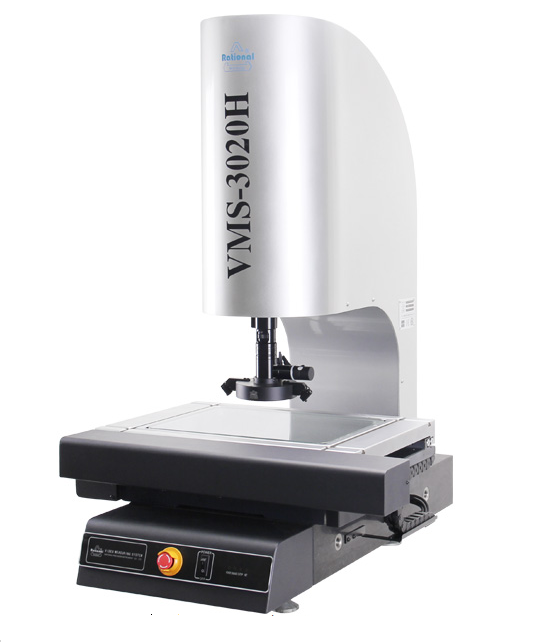
RATIONAL MANUAL Video Measuring System
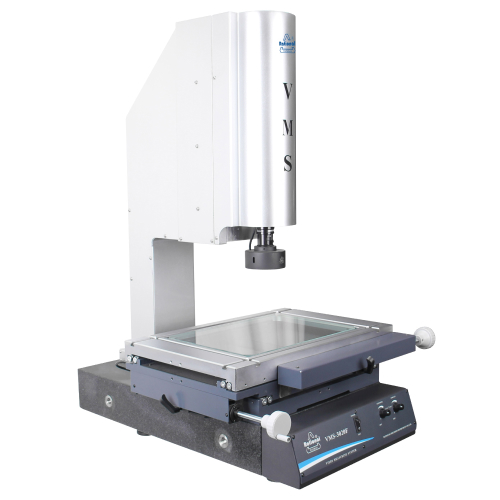

RATIONAL MANUAL Video Measuring System
Model: VMS-2515G/VMS-3020G/VMS-4030G/VMS-5040G, VMM-2515F, VMM-3020F, VMM-4030F
Brand: rational
Origin: China
요약
Rational Full Manual Video Measuring System
Used in 2D measurement as well as 3D measurement, this instrument is a high precision and high efficiency measuring machine that integrates optics, machinery and electronics. It is mainly used in the field of machinery, electronics, instrument, meter, watch, light industry, plastics as well as measuring chambers, laboratories of institutes and universities, research institutes, metrological verification departments and workshops, etc.
Features:
1. Various kinds of lighting - Meets various requirements for customers.
2. Data processing, data display, data input, and data output.
3. Pragmatic workpiece straightening feature.
4. Detects the measured workpiece’s specific location by laser indicator, which is convenient position and operate.
5. Foot-switch is matched with measuring software, which makes operation easier.
|
Working table |
Model | VMS-1510G | VMS-2010G | VMS-2515G | VMS-3020G | VMS-4030G |
| Metal table size (mm) | 354×228 | 404×228 | 450×280 | 500×330 | 606×466 | |
| Travel (mm) | 150×100 | 200×100 | 250×150 | 300×200 | 400×300 | |
| Z-axis travel (mm) | 200 (can be customized to 400) | |||||
| Consistency error of origin in different sections | G series: E0≤30 (every 100mm displacement in Z axis | |||||
| Linear scale resolution: 0.0005mm. X, Y-axis indication error: (2.5+L/100)μm (L is the length of the measured object. Unit: mm) | ||||||
|
Video system |
G seris | |||||
| 1/3”color CCD camera | ||||||
| Zoom lens magnification: 0.7X~4.5X | ||||||
| Magnification: 26.6~171X (19.5" monitor) | ||||||
| Object view: 8.1mm~1.3mm | ||||||
| Surface lighting and transmission lighting both adopt adjustable LED | ||||||
어플리케이션
Used in 2D measurement as well as 3D measurement, this instrument is a high precision and high efficiency measuring machine that integrates optics, machinery and electronics. It is mainly used in the field of machinery, electronics, instrument, meter, watch, light industry, plastics as well as measuring chambers, laboratories of institutes and universities, research institutes, metrological verification departments and workshops, etc.
Features:
1. Various kinds of lighting - Meets various requirements for customers.
2. Data processing, data display, data input, and data output.
3. Pragmatic workpiece straightening feature.
4. Detects the measured workpiece’s specific location by laser indicator, which is convenient position and operate.
5. Foot-switch is matched with measuring software, which makes operation easier.
명세서
|
Working table |
Model | VMS-1510G | VMS-2010G | VMS-2515G | VMS-3020G | VMS-4030G |
| Metal table size (mm) | 354×228 | 404×228 | 450×280 | 500×330 | 606×466 | |
| Travel (mm) | 150×100 | 200×100 | 250×150 | 300×200 | 400×300 | |
| Z-axis travel (mm) | 200 (can be customized to 400) | |||||
| Consistency error of origin in different sections | G series: E0≤30 (every 100mm displacement in Z axis | |||||
| Linear scale resolution: 0.0005mm. X, Y-axis indication error: (2.5+L/100)μm (L is the length of the measured object. Unit: mm) | ||||||
|
Video system |
G seris | |||||
| 1/3”color CCD camera | ||||||
| Zoom lens magnification: 0.7X~4.5X | ||||||
| Magnification: 26.6~171X (19.5" monitor) | ||||||
| Object view: 8.1mm~1.3mm | ||||||
| Surface lighting and transmission lighting both adopt adjustable LED | ||||||


