Col 1 content area
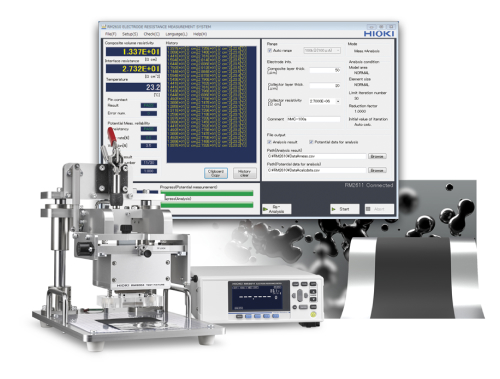
HIOKI ELECTRODE RESISTANCE MEASUREMENT SYSTEM


HIOKI ELECTRODE RESISTANCE MEASUREMENT SYSTEM
Model: RM2610
Brand: Hioki
Origin: Japan
Summary
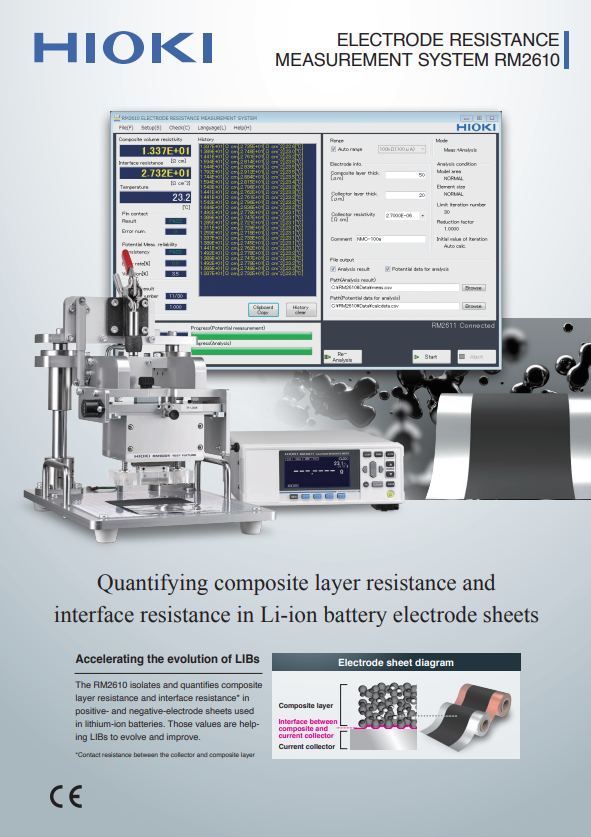
Quantify composite layer resistance and interface resistance in Li-ion battery electrode sheets
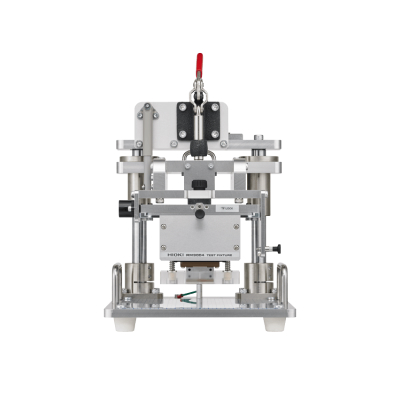
The RM2610 isolates and quantifies the resistance characteristics of electrode sheets, a major component of lithium-ion batteries (LIBs), as two components: the composite layer resistance and the interface resistance between the composite layer and collector. The system allows users to visualize these two quantities by measuring the surface of the electrode sheet with a test fixture that consists of an array of test probes and then using proprietary analytical techniques to quantify them.
Electrode Resistance Measurement System RM2610 - How to Perform Regular Maintenance
Introducing the procedures to verify continuity between the probes, resistance meter and DUT, as well as the insulation between probes. Because the test fixture does not have to be removed from the system but simply rotated to orient the probe head forward, cleaning and inspecting the probe is extremely easy.
Col 1 content area
Master the Use of the Hioki RM2612 Electrode Resistance Measurement Software: 1 to 4
Quantify the interfacial resistance (contact resistance) between the composite material layer resistance and the current collector layer against changes in the electrode sheet material (active material, conductive aid, etc.), composition, and coating conditions. Introducing the functions of the software application for the RM2610 Electrode Resistance Measurement System.
Step 1: USB Connection
Step 2: Selection of the Composite Layer Unit
Step 3: Measurement with Contact Check On
Step 4: Re-Analysis of the Most Recent Potential
Col 1 content area
Electrode cleaning using MAINTENANCE TOOL RM9006
The electrode cleaning procedure using the optional "MAINTENANCE TOOL RM9006" to keep the electrode probe of the ELECTRODE RESISTANCE MEASUREMENT SYSTEM RM2610 clean at all times.
Col 1 content area
Master the Use of the Hioki RM2612 Electrode Resistance Measurement Software: 5 to7
Step 5: Output of Analysis Results and Other Information
Step 6: Using the “Meas. Mode” and “Analysis Mode”
Step 7: Save/Load of Measurement and Analysis Configuration
Col 1 content area
Master the Use of the Hioki RM2612 Electrode Resistance Measurement Software: 8 to10
Step 8: When the Analysis Results are Negative
Step 9: Save Time and Maximize Efficiency
Step 10: When you want to force the calculation even with CONTACT ERROR
Col 1 content area
Master the Use of the Hioki RM2612 Electrode Resistance Measurement Software: 11
Step 11: Automatic Software Updates
Col 1 content area
Accelerate the Evolution of LIB R&D and Quality Control at the Electrode Sheet Stage
Open new horizons in your research of the electrode sheet by gathering data that was never before available.
Hioki’s new system is able to separately acquire the resistance of the composite layer and the interface resistance between the composite and the current collector.
This is done by measuring the potential at the electrode sheet surface and using a proprietary Hioki analytical technique to isolate each of these resistances.
*Watch with the video subtitles on, to see detailed descriptions.
RM2611 Electrode Resistance Meter requires regular calibration. For more information about calibration, please contact your authorized Hioki distributor or reseller.
| Measurement target | Positive and negative electrode sheets for rechargeable lithium-ion batteries | |||||
|---|---|---|---|---|---|---|
| Measurement parameters | Composite resistivity [Ωcm] Interface resistance (contact resistance) between the composite layer and current collector [Ωcm^2] |
|||||
| Computation method | Inverse problem analysis of potential distribution using the finite volume method | |||||
| Information necessary for computation | • Composite layer thickness [μm] (for 1 side) • Current collector thickness [μm] • Current collector volume resistivity [Ωcm] |
|||||
| Measurement time | - Contact check + potential measurement : approx. 30 sec. - Calculation : approx. 35 sec. (on a PC with Intel core i5-7200U CPU) The measurement time may vary depending on the measurement target and the processing capacity of the PC. |
|||||
| Measurement current | 10 μA (min.) to 10 mA (max.) | |||||
| Number of probes | 46 | |||||
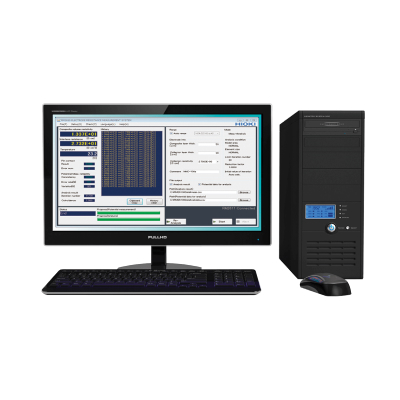
| Recommended PC specifications | CPU: 4 or more threads RAM: 8 GB or greater (4 GB required) Operating system: Windows 7 (64-bit), 8 (64-bit), 10 (64-bit) |
|||||
| Temperature measurement function | Measures temperature near the test fixture | |||||
| Included accessories | TEMPERATURE SENSOR Z2001 ×1, USB cable ×1, USB license key ×1, Probe check board ×1, Power cord ×1, Instruction manual ×1 | |||||
Application
Col 1 content area
Electrode Resistance Measurement System RM2610 - How to Perform Regular Maintenance
Introducing the procedures to verify continuity between the probes, resistance meter and DUT, as well as the insulation between probes. Because the test fixture does not have to be removed from the system but simply rotated to orient the probe head forward, cleaning and inspecting the probe is extremely easy.
Col 1 content area
Master the Use of the Hioki RM2612 Electrode Resistance Measurement Software: 1 to 4
Quantify the interfacial resistance (contact resistance) between the composite material layer resistance and the current collector layer against changes in the electrode sheet material (active material, conductive aid, etc.), composition, and coating conditions. Introducing the functions of the software application for the RM2610 Electrode Resistance Measurement System.
Step 1: USB Connection
Step 2: Selection of the Composite Layer Unit
Step 3: Measurement with Contact Check On
Step 4: Re-Analysis of the Most Recent Potential
Col 1 content area
Electrode cleaning using MAINTENANCE TOOL RM9006
The electrode cleaning procedure using the optional "MAINTENANCE TOOL RM9006" to keep the electrode probe of the ELECTRODE RESISTANCE MEASUREMENT SYSTEM RM2610 clean at all times.
Col 1 content area
Master the Use of the Hioki RM2612 Electrode Resistance Measurement Software: 5 to7
Step 5: Output of Analysis Results and Other Information
Step 6: Using the “Meas. Mode” and “Analysis Mode”
Step 7: Save/Load of Measurement and Analysis Configuration
Col 1 content area
Master the Use of the Hioki RM2612 Electrode Resistance Measurement Software: 8 to10
Step 8: When the Analysis Results are Negative
Step 9: Save Time and Maximize Efficiency
Step 10: When you want to force the calculation even with CONTACT ERROR
Col 1 content area
Master the Use of the Hioki RM2612 Electrode Resistance Measurement Software: 11
Step 11: Automatic Software Updates
Col 1 content area
Accelerate the Evolution of LIB R&D and Quality Control at the Electrode Sheet Stage
Open new horizons in your research of the electrode sheet by gathering data that was never before available.
Hioki’s new system is able to separately acquire the resistance of the composite layer and the interface resistance between the composite and the current collector.
This is done by measuring the potential at the electrode sheet surface and using a proprietary Hioki analytical technique to isolate each of these resistances.
*Watch with the video subtitles on, to see detailed descriptions.
Specifications
RM2611 Electrode Resistance Meter requires regular calibration. For more information about calibration, please contact your authorized Hioki distributor or reseller.
| Measurement target | Positive and negative electrode sheets for rechargeable lithium-ion batteries | |||||
|---|---|---|---|---|---|---|
| Measurement parameters | Composite resistivity [Ωcm] Interface resistance (contact resistance) between the composite layer and current collector [Ωcm^2] |
|||||
| Computation method | Inverse problem analysis of potential distribution using the finite volume method | |||||
| Information necessary for computation | • Composite layer thickness [μm] (for 1 side) • Current collector thickness [μm] • Current collector volume resistivity [Ωcm] |
|||||
| Measurement time | - Contact check + potential measurement : approx. 30 sec. - Calculation : approx. 35 sec. (on a PC with Intel core i5-7200U CPU) The measurement time may vary depending on the measurement target and the processing capacity of the PC. |
|||||
| Measurement current | 10 μA (min.) to 10 mA (max.) | |||||
| Number of probes | 46 | |||||
| Recommended PC specifications | CPU: 4 or more threads RAM: 8 GB or greater (4 GB required) Operating system: Windows 7 (64-bit), 8 (64-bit), 10 (64-bit) |
|||||
| Temperature measurement function | Measures temperature near the test fixture | |||||
| Included accessories | TEMPERATURE SENSOR Z2001 ×1, USB cable ×1, USB license key ×1, Probe check board ×1, Power cord ×1, Instruction manual ×1 | |||||


