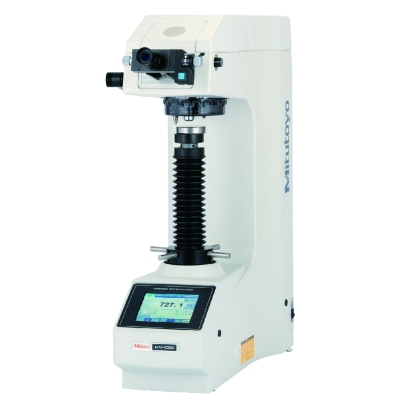
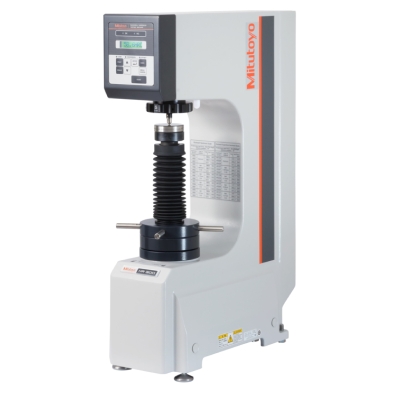
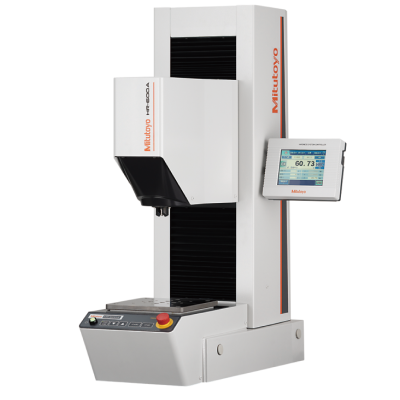
Rockwell Hardness Testing Machine HR-620B


Rockwell Hardness Testing Machine HR-620B
Model: 810-526-11
Brand: mitutoyo
Origin:
Summary
With innovative design and functionality that enables a wide variety of measurements, the HR-600 Series delivers hardness testing that defies conventional thinking.
Go above and beyond
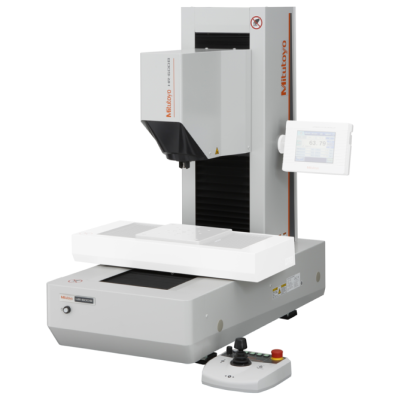
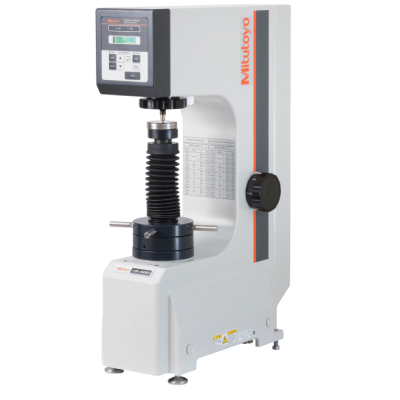
High-End CNC Rockwell Hardness Testing Machine, providing a fully automatic Rockwell hardness test sequence
The HR-600 Series combines the functionality of several previous models:
Rockwell hardness testing, Brinell hardness testing, Brinell and Vickers depth measurement hardness testing and hardness testing of plastic materials. Supporting all test types in a single machine, this new series expands the range of available measurements.
With its high-resolution scale load cell developed uniquely by Mitutoyo that allows for high-precision test load feedback control and state-of-the-art design that delivers both aesthetics and usability on the ground, the new HR-600 Series enables hardness testing that defies conventional thinking.
New design with functional beauty With a table for mounting workpieces and head with vertical mobility, the HR-600 Series is built for operability and usability. Its new design is highly focused on end-user usability, and the entire product structure has been inventively modified for functional beauty — a true embodiment of Mitutoyo’s pioneering spirit.
Attention:
* requires optional accessories
** more on request
*** can be enhanced with additional accesories
-The HR-600 series 810 hardness tester is designed to meet the requirements of measuring the hardness of large workpieces that cannot be placed on the measuring table of other conventional hardness testers. Maximum load capacity 100kg.
-The flexible movement assemblies on the machine allow automatic multi-point testing in various positions on a variety of workpieces.
-In addition to the Rockwell/Brinell tests on metals, the HR-600 series 810 also meets the plastic hardness test. Brinell and Vickers indent hardness tests that do not require non-contact measurement are also possible.
-HR-610A/620A series can work with touch panel display and HR-620B can work with touch screen with AVPAK software.
-Automatic testing with movements in the X, Y and Z axes for workpieces with uneven surfaces or steps is possible by adding an X-axis stand and AVPAK software to the HR-620B. In addition, using FORMEio software makes it easy to communicate with the PLC for automation purposes, such as controlling the processing of connected devices and systems.
- Applicable test methods and standards:
Rockwell, Rockwell Superficial (EN ISO 6508, ASTM E-18, JIS B7726)
Ball indentation test on plastic materials (EN ISO 2039-1)
Plastic test (EN ISO 2039-2, ASTM D785 A, JIS K7202-2)
Rockwell Alpha test (ASTM D785 B)
Brinell, Indentation only (EN ISO 6506, ASTM E-10, JIS B7724)
HBT (VDE/VDI 2616 - non standard)
HVT (VDE/VDI 2616 - non standard)
- Rockwell: HRA; HRF; HRH; HRL; HRR; HRD; HRB; HRE; HRM; HRS; HRC; HRG; HRK; HRP; HRV
- Rockwell Superficial: HR15N; HR15TW; HR15WW; HR15XW; HR15YW; HR30N; HR30TW; HR30WW; HR30XW; HR30YW; HR45N; HR45TW; HR45WW; HR45XW; HR45YW
- Brinell: HBW 1/10; HBW 2.5/6.25; HBW 5/25; HBW 10/100; HBW 1/30; HBW 2.5/15.625; HBW 5/62.5; HBW 2.5/31.25; HBW 5/125; HBW 2.5/62.5; HBW 2.5/187.5
- Brinell Depth Measurement: HBD 2.5/62.5; HBD 2.5/187.5; HBD 5/250
- Vickers Depth Measurement: HVD 30; HVD 50
- Rockwell Plastic test: HRE; HRL; HRR; HRK; HRM
- Rockwell α plastic test: (HRR)
- Ball Indentation plastic test: HB 49N; HB 132N; HB 358N; HB 961N
- Functionality:
5,7" touch screen display (optional)
mm (optional)
mm/inch (optional)
AVPAK software control (optional)
HR unit resolution: 0,01
Test force range 1-250kg, 9,8-2450N
Test force switching by software
Real time test force control
Fully automatic test cycle
Motorized test force generation
Motorized Z-Axis
LED workroom illumination
RS-232C Digimatic, USB2.0 interface
USB stick data transfer (optional)
Jominy-test capability*
Footswitch connection for serial test
- Functional dimensions:
Contact unit contact area: ** 18x4mm
Minimum inside radius of workpiece: 25mm
Minimum inside Ø of workpiece: 400mm
Minimum outside radius of workpiece: 20mm
Basic test surface 200 x 200mm ***
Anvil adaption Ø 10mm / Ø 19mm (optional)
Max. specimen height (reduced by addiing accessories and X-axis): 250mm
X-axis option (optional)
Z-axis height (Max. specimen heigh)t: 250mm
Z-axis height with X-axis added (Max. specimen height): 165mm
Y-axis range: 160mm
Throat depth: 220mm
Max. specimen weight: 100kg
Max. specimen weight with X-axis mounted: 50kg
Max. speed Y: 48mm
Max. speed Z: 10mm/sec
- Main unit dimensions:
External dimensions 428(W) × 837(D) × 935(H) mm
External dimensions display unit 191(W) × 71(D) × 147(H) mm (optional)
Mass main unit: 205kg
Power supply AC100V, 120V, 220V, 240V Auto-selection
Power cord not included
Operation temperature: 5-40 °C
Humidity: 55-65% (without dew condensation)
Application
-The HR-600 series 810 hardness tester is designed to meet the requirements of measuring the hardness of large workpieces that cannot be placed on the measuring table of other conventional hardness testers. Maximum load capacity 100kg.
-The flexible movement assemblies on the machine allow automatic multi-point testing in various positions on a variety of workpieces.
-In addition to the Rockwell/Brinell tests on metals, the HR-600 series 810 also meets the plastic hardness test. Brinell and Vickers indent hardness tests that do not require non-contact measurement are also possible.
-HR-610A/620A series can work with touch panel display and HR-620B can work with touch screen with AVPAK software.
-Automatic testing with movements in the X, Y and Z axes for workpieces with uneven surfaces or steps is possible by adding an X-axis stand and AVPAK software to the HR-620B. In addition, using FORMEio software makes it easy to communicate with the PLC for automation purposes, such as controlling the processing of connected devices and systems.
Specifications
- Applicable test methods and standards:
Rockwell, Rockwell Superficial (EN ISO 6508, ASTM E-18, JIS B7726)
Ball indentation test on plastic materials (EN ISO 2039-1)
Plastic test (EN ISO 2039-2, ASTM D785 A, JIS K7202-2)
Rockwell Alpha test (ASTM D785 B)
Brinell, Indentation only (EN ISO 6506, ASTM E-10, JIS B7724)
HBT (VDE/VDI 2616 - non standard)
HVT (VDE/VDI 2616 - non standard)
- Rockwell: HRA; HRF; HRH; HRL; HRR; HRD; HRB; HRE; HRM; HRS; HRC; HRG; HRK; HRP; HRV
- Rockwell Superficial: HR15N; HR15TW; HR15WW; HR15XW; HR15YW; HR30N; HR30TW; HR30WW; HR30XW; HR30YW; HR45N; HR45TW; HR45WW; HR45XW; HR45YW
- Brinell: HBW 1/10; HBW 2.5/6.25; HBW 5/25; HBW 10/100; HBW 1/30; HBW 2.5/15.625; HBW 5/62.5; HBW 2.5/31.25; HBW 5/125; HBW 2.5/62.5; HBW 2.5/187.5
- Brinell Depth Measurement: HBD 2.5/62.5; HBD 2.5/187.5; HBD 5/250
- Vickers Depth Measurement: HVD 30; HVD 50
- Rockwell Plastic test: HRE; HRL; HRR; HRK; HRM
- Rockwell α plastic test: (HRR)
- Ball Indentation plastic test: HB 49N; HB 132N; HB 358N; HB 961N
- Functionality:
5,7" touch screen display (optional)
mm (optional)
mm/inch (optional)
AVPAK software control (optional)
HR unit resolution: 0,01
Test force range 1-250kg, 9,8-2450N
Test force switching by software
Real time test force control
Fully automatic test cycle
Motorized test force generation
Motorized Z-Axis
LED workroom illumination
RS-232C Digimatic, USB2.0 interface
USB stick data transfer (optional)
Jominy-test capability*
Footswitch connection for serial test
- Functional dimensions:
Contact unit contact area: ** 18x4mm
Minimum inside radius of workpiece: 25mm
Minimum inside Ø of workpiece: 400mm
Minimum outside radius of workpiece: 20mm
Basic test surface 200 x 200mm ***
Anvil adaption Ø 10mm / Ø 19mm (optional)
Max. specimen height (reduced by addiing accessories and X-axis): 250mm
X-axis option (optional)
Z-axis height (Max. specimen heigh)t: 250mm
Z-axis height with X-axis added (Max. specimen height): 165mm
Y-axis range: 160mm
Throat depth: 220mm
Max. specimen weight: 100kg
Max. specimen weight with X-axis mounted: 50kg
Max. speed Y: 48mm
Max. speed Z: 10mm/sec
- Main unit dimensions:
External dimensions 428(W) × 837(D) × 935(H) mm
External dimensions display unit 191(W) × 71(D) × 147(H) mm (optional)
Mass main unit: 205kg
Power supply AC100V, 120V, 220V, 240V Auto-selection
Power cord not included
Operation temperature: 5-40 °C
Humidity: 55-65% (without dew condensation)


